Saturday, December 25, 2010
Friday, December 10, 2010

Saturday, November 6, 2010
Power, Lights, Action!


Monday, October 25, 2010

Friday, October 22, 2010
National Defense

Tuesday, October 12, 2010
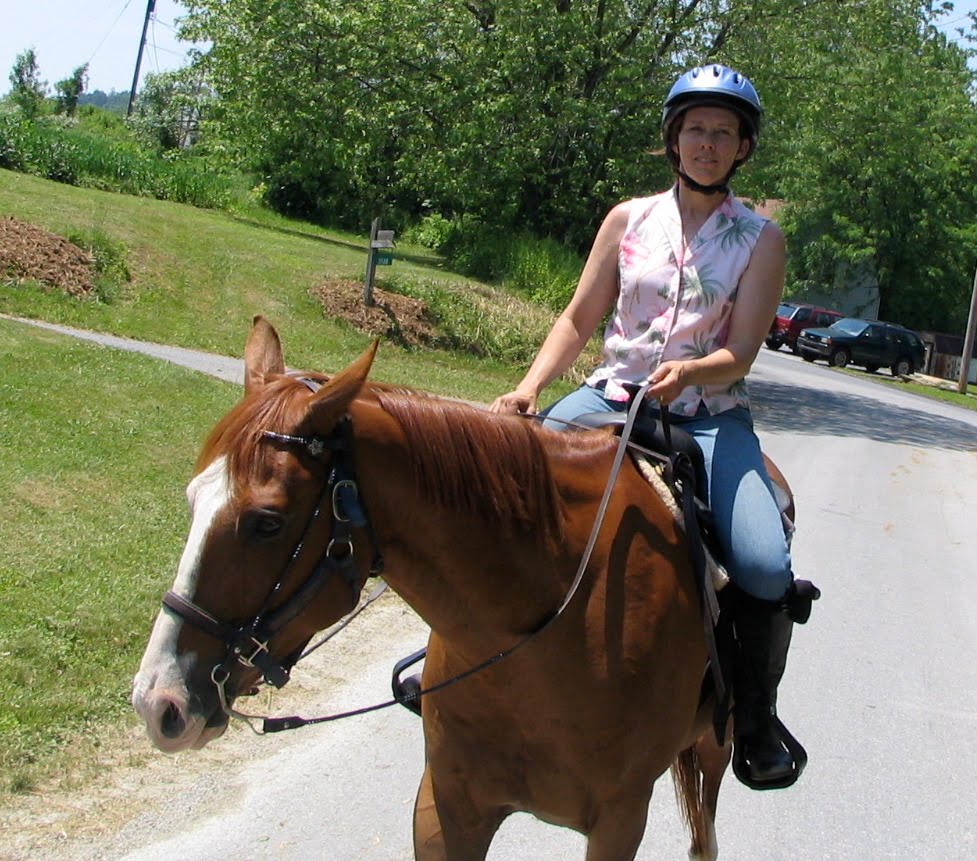
Swim, Ride, Run

She did a 600 meter swim in the Gulf, 18 mile bike ride down the National Seashore, & 5K run around Pensacola beach. Great job! I am so proud of you.


Saturday, October 9, 2010
Eastern Women's Lacrosse vs. Alumni


Friday, October 8, 2010
Why, switch?

Well, sort of . . . You may notice that the lights are lit the opposite way the switch is thrown. You would think that the left terminals of the switch are powered when the toggle is thrown to the left. You would be wrong. This is a cruel joke. Why, switch?

Now all I need to do is unsolder 12 LED leads and connect 12 criss-crossed jumper wires to fix this. Gee, only 24 solder joints to go . . . Grr!
Thursday, October 7, 2010
The Youngest Cowgirl

New Recording Artist

Tuesday, October 5, 2010
Control Panel

Even though I plan to use DCS and TMCC command control, I have concluded that it does not necessarily replace block wiring if you want to run conventional locos as well. There are times when you want to be able to shut off power to a block. So I am wiring to allow for command and conventional. So much for keeping it simple.
 |
| Backlit to show the LEDs |
I did the track diagram with Microsoft Paint, printed it on photo paper, and sandwiched it between a masonite base and a 1/16" plexiglass cover. The most tedious part was drilling holes in the masonite for the toggles switches, buttons, and LEDs, and cutting out rectangles to insert the Z-Stuff 2502 switch controllers. The 2502s will be mostly hidden: only their buttons and LEDs show. The plexiglass only needed holes for the toggle and pushbutton switches. On the paper diagram, I cut out circles for all the LEDs and switches with 3mm, 6mm, and 8mm disposable punch biopsies (think cookie cutters).
 |
| Paper template to lay out the holes and cutouts |

 |
| Cutouts for the 2502 Controllers |
So the soldering begins. One half of the DPDT toggles select CAB A or CAB B for its block, and the other half lights up the corresponding red or yellow LED. The LEDs will be powered from a 4.5V DC power adaptor through current limiting resistors.
This panel will be so cool that you won’t even need to look at the trains . . .
Saturday, October 2, 2010
Running the Gauntlet


Come on Kaylee.
You can do it . . .
Sunday, September 19, 2010
The Paper Chase

Wednesday, September 1, 2010
The Nobel Horse
Horses came into my life through my wife Judy. Riding has been her joy for the last 15 years. But for me, not so much. Well, at first, anyway. I took some English riding lessons with her 7 years ago, and while it was very helpful, it just did not hold my interest.
 |
| Me on Barron |
Things changed in 2006: We bought two horses, a Quarter Horse Stallion (Barron) and his son, a Paint (Tzar). Barron was the perfect "Husband Horse," meaning he is so well behaved that you could even put an inexperienced husband on him. Fortunately, Barron was patient as I learned. Allie, Dan, and I took turns riding him through woods and farms. Now, I was having fun!
 |
| Judy on Tzar |
 |
| Allie on Barron |
 |
| Dan on Barron |
But it wasn't until the next year that I was hooked. I watched my first Polocrosse Tournament at Black Horse Farm in Felton. I watched the US Polocrosse team play the visiting Irish team. The sights and sounds of six noble horses racing up and down the field can't be described. It can only be experienced. I came away from that weekend thinking, "This is so cool, but I'll never be able to do that." Or maybe I would . . .
 |
| Allie and Me |
The following summer, the opportunity came. Judy, Allie, and I joined the Spring Valley Polocrosse Club. To say that it was slow at first, was an understatement. I was still a beginning rider and it was a challenge to try to get Barron to move where I wanted while trying to scoop up the ball from the ground. I had no racket skills and no riding skills, but I was having fun. Then came the news: There was a tournament coming up in 3 weeks. Would we like to compete? 3 weeks into the sport, and we were headed for a tournament! We walked, trotted, stumbled and fumbled that tournament weekend, but we had fun.

The next couple of years Judy and I progressed in our riding and Polocrosse skills. Barron did well as a beginner horse. Tzar, not so much, so Judy leased Ria, a wonderful, fast, experienced Polocrosse horse. We moved beyond trot, and now we were galloping down the field.

But I found that Barron had his limits. He was willing and usually patient as he learned the sport, but as the level of played progressed, we were literally being left in the dust. He just did not have the speed. This became more apparent at the 2010 Bay Area Tournament. We ended up with second place. We played the 1st place team twice, and twice, Barron and I got pushed all around the field by a mare, who happened to have "For Sale" painted on her butt. We looked at her that afternoon, bought her and took Kahlua home that weekend. Kahlua won best horse honors that weekend.
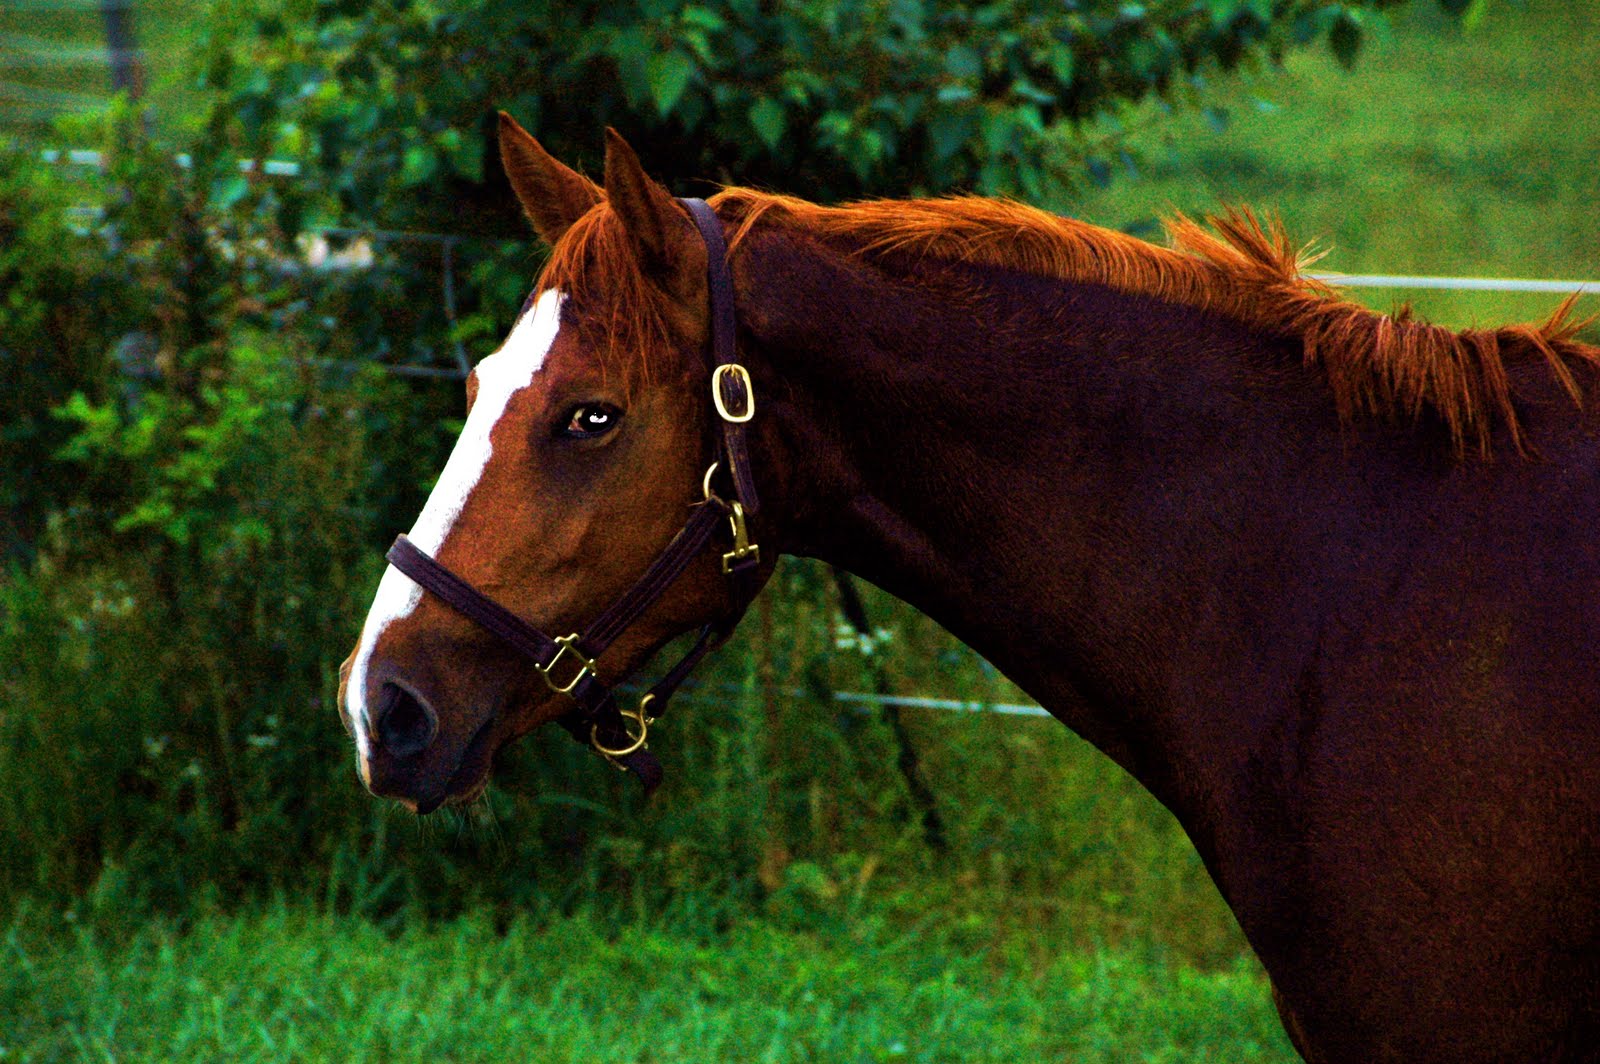 |
| Kaylee |
As there was already a Kahlua on the farm where we boarded, we renamed her Kaylee. She is a delight to ride: energetic, fast, and sure-footed. You just give her the lightest signal and she responds. Did I mention that she is fast? There is no feeling on this earth like the feel of racing down field or trail on a fast horse. Oh, yeah, now I am hooked . .
How do you glue down Gargraves track?
After a few weeks of testing (ie., running trains around and around), I decided that it is time to glue down the track. I am using the Woodland Scenics tacky glue. It was a big pain, since I need to pull the track up about an inch or so (with the feeder wires attached), paint the glue on the underside of the ties, and then push it down and weight it down, all before the glue dries. I could only do about 5 feet at a time. How do you keep the track down? You weigh it down with an MTH Allegheny, of course. And then any heavy object you can find. Eventually, I figured out that it works better to apply the glue to the roadbed. I have already covered all the ways NOT to do it, so it is going smoothly now.
 Then I got to the crossover . . .
So, this was a pain, lifting up the crossover (with 4 tracks attached). Of course, both center rail power pickups pop out (remember all my failed attempts to feed the center rails?). Well, this was not going to work. So, out comes the soldering iron. Yeah, right!! Did you know that the blackened center rail is the only metal in the universe that solder will not stick to? Back to the drawing room. Finally the solution comes to me: Drill a hole through the vertical part of the rail, loop a copper wire through, and solder it to itself. Success!! And the solder even stuck to the drilled bare metal.
I fed the switch machine wires down through the table to wire them up, and then remembered that I don’t yet have a control panel. So, that will be the next project while I am waiting for each section of glue to dry. Fortunately, I have a borrowed Z-4000 to properly size the control panel. I am going to try to keep the panel size down to somewhere less than half the size of the layout . . .
Monday, August 16, 2010
A Large Distraction

I did get down to the basement tonight, but I was distracted by the Lionel G-scale 0-6-0. I have been trying to get it to run smoothly. Instead of smooth motion, it goes thwack-thwack-thwack-thwack. The idler gears wobble all over the place and one of the drivers was not squared. I did a lot of unsuccessful tweaking, then I took out the idler gears and just had it drive using the drive rods. More thwack-thwack-thwack-thwack. Now I am out of ideas, so I put the idler gears back in place and reassembled it. Success! No more thwack! Not sure how I fixed it, but I think that one of the idler gears must have been offset by one tooth.
So, now I have a fine running, fine looking "around the Christmas tree" narrow gauge train.
Monday, August 2, 2010

Wednesday, July 28, 2010
Planning for a "Hindenburg"
Layout was on hold for a little, but started on it again this AM. I got out the MTH Passenger station and fit it plus one of the 2 covered platforms trackside (based on John's suggestion of shortening one track to a stub ending at the station). It will work great unless there is a runaway locomotive, in which case the slaughter in the station will rival the Hindenburg disaster “Oh, the humanity . . .”
Gomez Addams would be proud.
Monday, July 26, 2010
Maiden Run
This was the maiden run on the mainline. Here is the link:
I have since put in the roadbed and most of the track on the locomotive servicing and passenger sidings. Got the MTH passenger station fitting in nicely. All I have left is the 2 industrial sidings in the center of the layout. Then it will be scenery time. Actually, then it will be time to get out John’s big articulated Allegheny, and hook up the z4000 and command control and just watch trains go ‘round and ‘round.
Tuesday, July 20, 2010
MTH Sinclair Gas Station
I just bought this MTH Sinclair Gas Station from a collection. I have been looking on the 'bay for a while. Now I just need to figure out where to put in on the layout. These MTH buildings are big . . .

Saturday, July 10, 2010
Doing things the hard way

So, once again, I am finding a way to make things more complicated. Kind of a model railroad masochist . . .
Friday, July 9, 2010
Laying track


Sunday, June 27, 2010
Old Gargraves Turnouts


Wednesday, May 26, 2010
Two steps forward, one step backwards
It is a challenge to bend Gargraves track. I can bend an "S" curve and it will hold its shape just fine. But an O-42 or even an O-54 won't stay. And if I adjust the ties to straighten them, I lose even more of the curve. Honestly, the problem is that I am trying to pre-shape track to glue it down, rather than screw or nail it down as is recommended. The solution: I am buying Gargraves sectional track for the curves and using flex-track for the straights, "S" curves and a few short curves on the turnouts. Time to call Just Trains of Delaware.
 In the meantime, I made up 42" and 54" diameter cardboard templates to lay out the track plan center lines. The mainlines have 4" spacing on the straights, and 4 1/2" on the curves. John brought over some 60' and 70' passenger cars and an MTH Allegheny to test track clearances. I put the 70 footers on the 2 mainline tracks and I have an inch of clearance on the curves (real inches, not scale inches!). Of course, when I couple the cars on the same track, the angle from car to car would only be seen in a prototypical derailment . . .
 I am using Woodland Scenics trackbed and it is so easy to work with. It is partially split and I use a box cutter to split it the rest of the way, then spread Woodland Scenics Foam Tack Glue on the back of a half section and lay it along the centerline. I pin it down with Woodland Scenics Foam Nails, then repeat the above for the other half section of roadbed. It goes really fast. Say goodbye to cork roadbed . .


 I am using Woodland Scenics trackbed and it is so easy to work with. It is partially split and I use a box cutter to split it the rest of the way, then spread Woodland Scenics Foam Tack Glue on the back of a half section and lay it along the centerline. I pin it down with Woodland Scenics Foam Nails, then repeat the above for the other half section of roadbed. It goes really fast. Say goodbye to cork roadbed . .
Wednesday, May 19, 2010
Adding an extra foot (why planning ahead would have helped)
The benchwork extra foot is done and installed. It took nearly as much work as the original 5X10. So much for afterthoughts . . .
I am getting ready to lay out the track plan and glue down woodland scenics roadbed. Also need to build a wooden jig or 2 to bend the Gargraves (a strong recommendation from what I read). I am still not sure how well this is going to work on top of 2” of foam since I can’t screw down the track. Straights will be fine. For the curves, I am hoping that if I pre-bend the track and weight and glue it, it will be ok. I will try a section, and if it fails miserably, I will pull off the foam and maybe add another 1/8” underlayment and put the roadbed and track on that. I’ll have to give up on most of the below grade scenery, but I’ll cope. To be honest, a lot of things will be easier if I pull the foam off, but I have a pathological tendency to avoid doing things the easy way.
Tuesday, May 4, 2010
New Track Plan
I played around with my "elevated loop crossing over a flat loop" track plan. Tried to connect the two at one end, but it just wasn't working. So, now I am back on the web looking for a new track plan. Good news: I found exactly what I want. Bad news: I have to make my 5X10 table into a 6X10 table. Out comes the saw . . .
Here is the layout photos and plan:
Mike's O Gauge Train Site
He did a tremendous job of modeling and design in a small space. You would never know it was only 6X10 from the photos. The layout even has a dual track mainline.
I made some changes to his plan to allow O-42 curves on the inner loop and O-54 on the outer. But I am very grateful to Mike and I want to give him credit for his design and inspiration.

Saturday, April 17, 2010
Testing Frankenstein
I stopped by Cool Trains on my way home from Lancaster yesterday. In their "Yard Sale" area, he had the same MTH PRR RS3 that I missed buying at the Timonium show. Also a PRR N5C Caboose and a little Z-500 transformer. I made it home before our company arrived, but no time to test our the RS3. They left around 10PM, Judy went to bed, and I headed down to the basement.

Finally, I had a train to test out on my "Frankenstein" layout. Why Frankenstein? It has 2 loops of track loosely put together with one elevated O track, and a ground level O27 track. Mixed in are some O-42s, O-54s, and some K-Line Super K track with ties. Then I stepped back and looked at a bunch of dirty, grungy, used "O" track (even a few rusty pieces) and I decided I needed to clean it before running my new prize on it. So out came the Scotch Brite pad, then the vacuum. OK, got the wires hooked up, engine on the track. I crank up the throttle, engine does nothing, power supply buzzes, and its circuit breaker pops. Darn! OK, take RS3 off the track, crank up the throttle, and it pops again. OK, now this is a simple loop of track, no switches. Nothing is laying across the track. Why is the circuit breaker popping? Not having any fun yet . . .
So I start inspecting the track closely, and sure enough, one straight section had 2 missing center rail insulators! So I stole the insulators from an old piece of O27, put everything back together, RS3 back on the track, turn up the throttle and hear the sweet sound of an engine starting, horn blowing, light comes on, radio conversations. Great! Now, how do you get it to actually move? So I am randomly hitting buttons, turning dials and It starts to move. Never did figure out how to actually control it. I did run it around the track a few times, but it was getting very late, the trainsounds were cranked to max. volume, and my son got home and I did not want to keep him up, so I quit for the night.
So before I went to sleep, I actually read the manual. Very helpful . . . There is a little more to it than "turn throttle, train go."
Saturday, February 6, 2010
Benchwork does not need to weigh a ton
After much thought, the decision is made. This O-scale adventure would start out small: a 5X10 layout. And it needs to be easily dismantled and moved. Blue foam is now popular in HO and N, but could it work in O? I came up with a design for two 5X5' lightweight 1X3" wood frames topped with 3/16" underlayment and 2" blue foam.


I built 4 "H"-shaped 1X3" legs and diagonal braces, bolted the 2 sections together, glued on the blue foam with latex caulk and the table was done.
Friday, January 15, 2010
It started again . . .
"Toy trains allow boys to be men, and men to be boys"
 It was over the 2009 Christmas holidays at a family dinner, I wondered into my brother-in-law's basement. Like every Christmas, he had his post-war Lionel train set under the Christmas tree. A jet black steam engine on 3 silver rails, surrounded by a sea of green plywood, punctuated by an occassional Plasticville building. I was drawn to the vintage transformer, just like the first time in my early childhood. Power on, turn the throttle, and the steamer lighted and growled to a start. I was hooked again.
In childhood, it started in 1959 with a battery operated HO train and a small loop of track. I don't remember much about that one, other than my dad putting a cigarette in the smokestack so my train would smoke. I asked him how I was going to get the train to smoke when he wasn't there, so he blew some smoke into a jar and gave it to me. I was pretty excited about that until I tried to use the smoke. I was disappointed, but fortunately, I did not take up smoking . . .

But somewhere around 6th grade, I was ready for serious model railroading. I sold it all in a yard sale, and took my $45 and bought N-scale equipment (wonder what the AF equipment is worth today? Ouch!). I could fit a lot of railroading on that same 4x8 table. The table was on pulleys and could be hoisted up or lowered down from the ceiling. It had multiple mainlines, crossovers, and block wiring. Well, I got the cork roadbed and the track down and then discovered girls. So, the layout was hoisted up to the ceiling and collected dust for a few years before going the way of the yard sale.

After 2 years, we were back to York. The house was a fixer-upper, but it had a full, unfinished basement. Oh, yeah! But the house came first. We worked like crazy painting, wallpapering, gardening, and then finally I finished off the basement. In the meantime, I found the perfect track plan in RMC, so I finished off a 11x13 train room. Benchwork was built from Pallet lumber. Return loops ran through the wall and into the furnace area (causing great embarrassment to Judy as she had to have the furnace guy crawl under the track to do his work). I painted blue sky and clouds on the wall and managed to lay about half of the track. Layout work was punctuated with dragging Judy and the kids to train shows, Steamtown, Strasburg, and East Broad Top. She really was a good sport about it. But, alas, the family grew to 6, life got too busy, and the trains collected dust until they were put into storage when we moved to a new home in 1999.

It was back to train shows. I called my friend Dave who had invited me to TCA York a few years ago. He gave me an update on the hobby and we went to a Greenburg show. I bought a few Lionel cars and Plasticville buildings and did a lot of looking. It was then that I found out that in O Gauge, you can model classic postwar or scale hi-rail. I was fascinated with the postwar trains and especially the accessories, but then there were those incredibly detailed Scale Locomotives with command control, smoke, and sound. At the World's Greatest Hobby show at Dulles, I saw the latest scale offerings from MTH, Lionel, and Williams. This was going to be a hard decision. One of my friends, John, was a big MTH fan. We went to a couple of train shows together and he quietly showed me the virtues of scale MTH. Suddenly, my Plasticville buildings looked too small because, well, they WERE too small. The decision was made. Scale Hi-Rail it was. But I was still going to make room for some of those cool post-war accessories.

Now I was beginning to realize just how big these trains were, and how much room they require. But this time I wanted to actually finish a layout, so I was definitely going to go small. I settled on a 5x10 foot design with a high track and a low track. I built the table, topped with 2" of blue foam and laid out some tinplate track. I arranged and re-arranged the track, but I wasn't satisfied with the design. So, I was back on the web looking for new designs and I discovered a 6x10 dual mainline layout with beautiful mountains and scenery. I made a few design changes to allow O45 curves on the inner loop, and O54 curves on the outer. The plan was set.

So here follows the trials and triumphs of layout construction. I hope it brings smiles, laughter and a few tears . . .

Subscribe to:
Posts (Atom)